- Published on
Building Your First n8n Automation: Sending Telegram Messages
- Authors

- Name
- Nguyen Phuc Cuong
If you're looking to dip your toes into workflow automation, creating a Telegram message sender with n8n is the perfect starter project. In this guide, I'll walk you through setting up a simple yet powerful automation that sends messages to Telegram on a schedule.
What You'll Need
- Docker installed on your machine (Get Docker here)
- A Telegram account
Step 1: Create Your Telegram Bot
First, let's set up a Telegram bot that will send your messages:
- Open Telegram and search for
@BotFather - Send the command
/newbotand follow the instructions - Give your bot a name and username when prompted
- Important: Copy the bot token you receive - you'll need this later!
Step 2: Get Your Telegram Chat ID
To send messages to yourself, you need your chat ID:
- Start a conversation with your newly created bot in Telegram (send any message)
- Open this URL in your browser (replace
YOUR_TOKENwith your actual bot token):https://api.telegram.org/botYOUR_TOKEN/getUpdates - Look for the
chat.idfield in the JSON response and copy that number
Step 3: Set Up n8n Using Docker Compose
Let's get n8n running with Docker Compose:
    version: '3.1'

    services:
    n8n:
        image: n8nio/n8n
        ports:
        - 5678:5678
        volumes:
        - ~/.n8n:/home/node/.n8n
        environment:
        - TELEGRAM_BOT_TOKEN=your_bot_token
- Create a
docker-compose.ymlfile with the content above - Replace
your_bot_tokenwith the token you received from BotFather - Open your terminal and run:
docker-compose up -d - Access the n8n dashboard at http://localhost:5678
Step 4: Build Your Telegram Message Workflow
Now let's create your first automation workflow:
Add a Cron Node (this will trigger your workflow)
- Set the trigger frequency (every minute for testing, or customize as needed)
- For a one-time test, you can keep the default settings
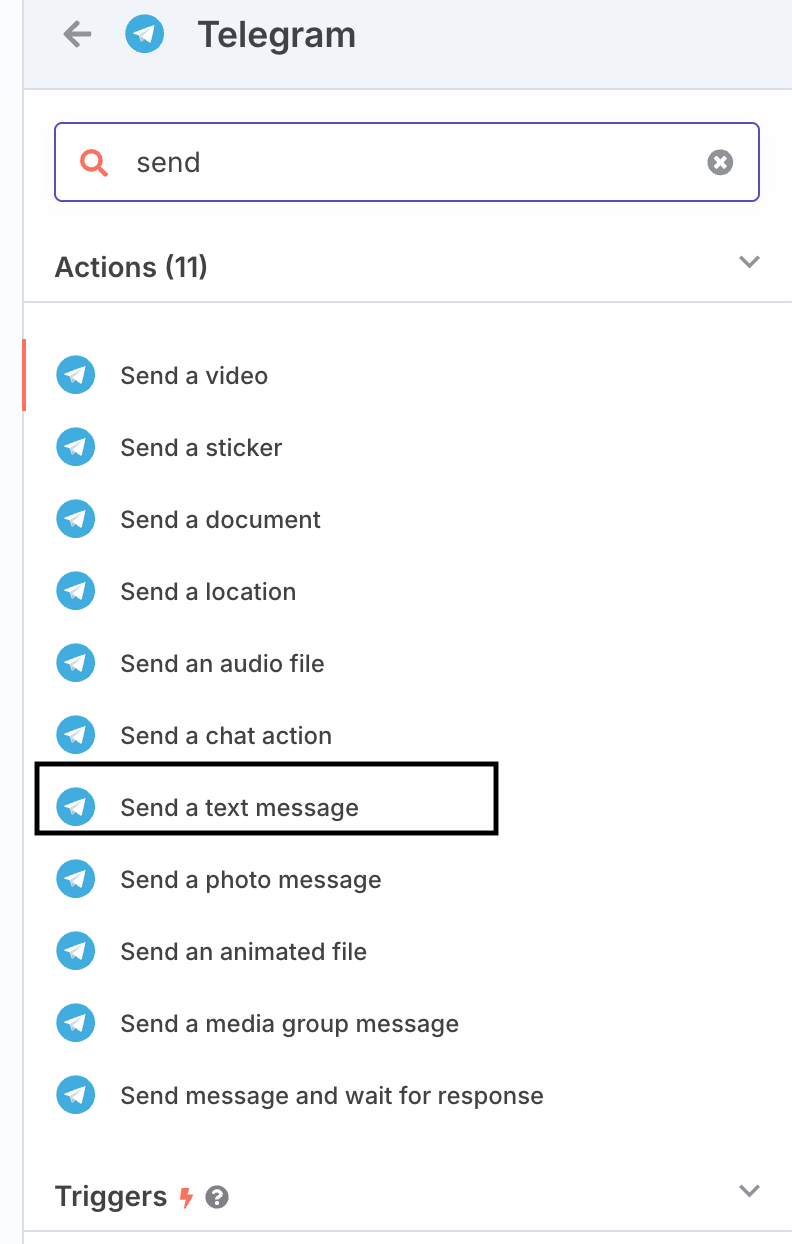
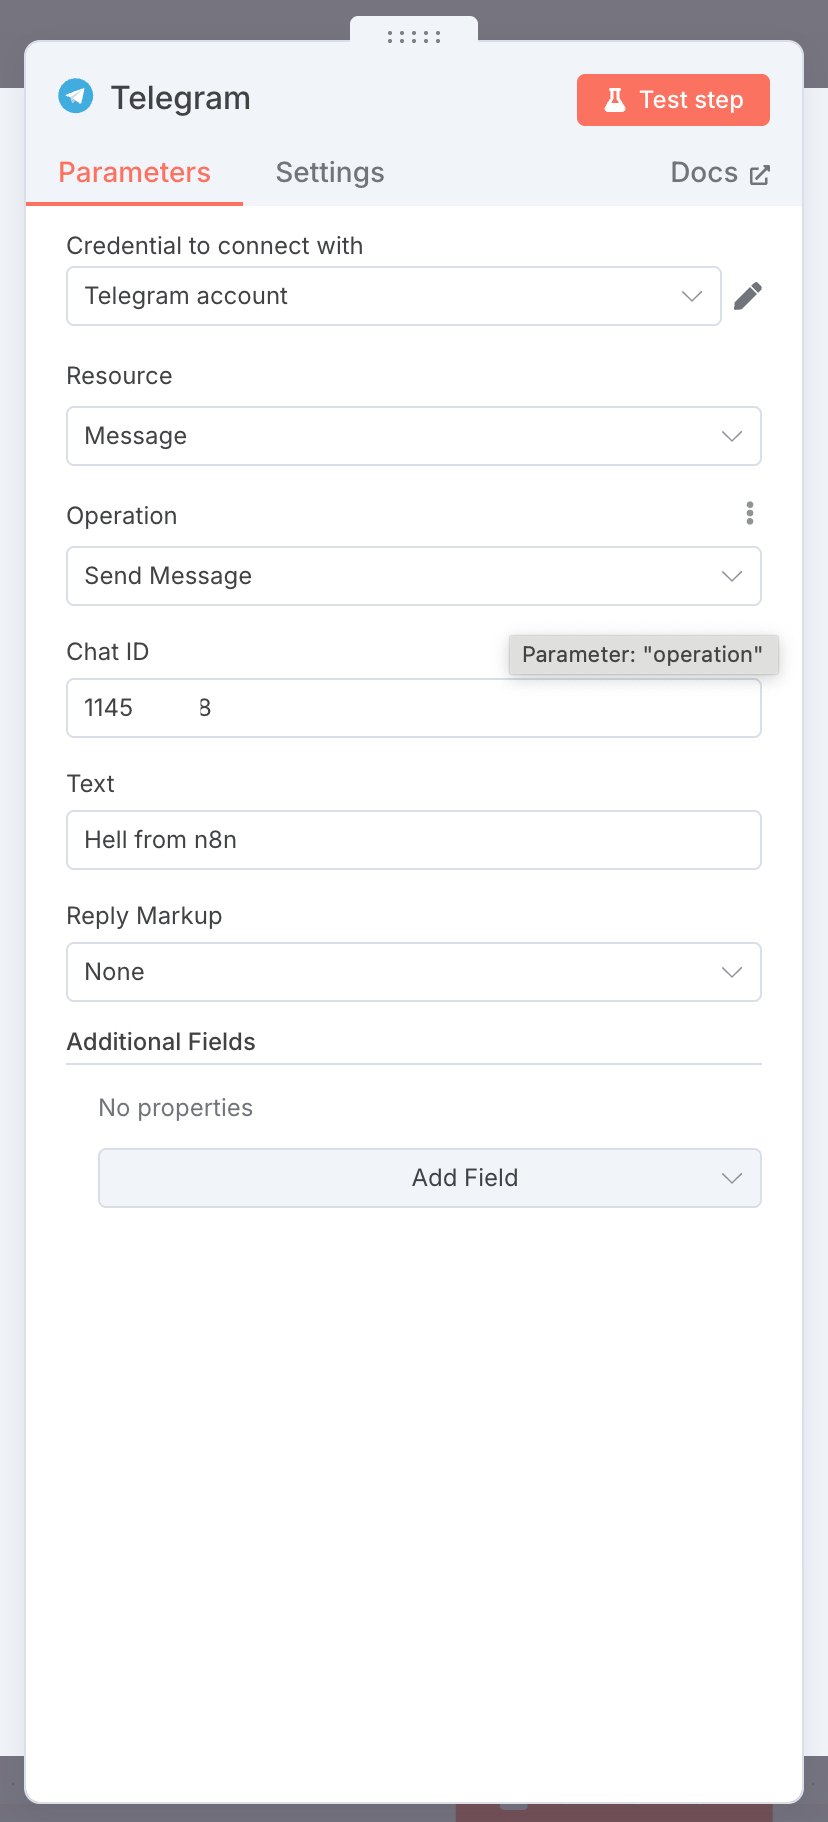
Add a Telegram Node
- Select Resource: Message

- Operation: Send Message

- Enter your Chat ID (from Step 2)
- Type your message text:
Hello from n8n! 🚀 - Enter your Bot Token (from Step 1)

Connect the Nodes
- Draw a connection from the Cron node to the Telegram node
Test Your Workflow
Click the Execute Workflow button to run a test

- Check your Telegram - you should receive the message!

Activate the Workflow (Optional)
- If you want this to run automatically based on your trigger, click the Activate toggle
Next Steps and Customizations
Once you have the basic workflow running, you can enhance it by:
- Adding dynamic content to your messages
- Connecting to other services like weather APIs, RSS feeds, or databases
- Creating conditional logic for when to send messages
- Adding more nodes to create complex workflows
Troubleshooting Tips
- If you don't receive messages, double-check your bot token and chat ID
- Make sure you've started a conversation with your bot in Telegram
- Check the n8n execution logs for any errors
That's it! You've successfully created your first n8n automation workflow that sends messages to Telegram. This simple project demonstrates the power of n8n for creating custom automations without complex coding.
What automation will you build next?